Showing posts with label Sew Sweetness. Show all posts

Friday, May 10, 2024

Sewing Weekend!

 This blog is right at a year old.  I had written it out and never posted it.  I decided to go ahead and post it so you can see what we were working on a year ago.  Haley has completed her strawberry quilt and gifted to her newborn daughter!  

I use the Adventure Sling everyday, it's my go-to bag.  The water bottle holder, not so much.  I'm really surprised I don't use it nearly as much as I expected.  I guess it's just heavy when I have a full bottle of water and it makes my shoulder hurt after a while.

Here is the original blog from May 7, 2023:

After a long hiatus I'm trying my hand at blogging again.  I've been retired for about a year now and finally feel like I have the time and energy to make time for me to sew again.  

The name Sew Time for Me originally came about when my kids all grew up and left the nest.  I honestly felt at that time I was going to have time for me.  Well, that didn't work out so well.  Work, family obligations and my own head got in the way.

For the last several months I've finally been sewing on a regular basis.  I still don't get to sew every day or even every week, but it's definitely more often than I used to sew.  My sister, Kim, one of my daughters, Haley, and one of her friends, Sam, get together once every month or two for a sewing weekend.  

Every weekend that we get together, we all plan our projects out ahead of time.  I had two projects I wanted to work on.  The first was the Mistflower Water Bottle Tote from Season 4 Minikins by Sew Sweetness.  The second project was the Adventure Sling Bag by Missouri Star..  I'll have reviews of both patterns in a later blog.

 Kim worked on finishing a quilt top and starting another. Haley started a quilt and Sam made an apron.


My completed projects!


Haley's progress on her quilt. She completed all the strawberry blocks.  On our next sewing weekend she will work on the sashing and sewing everything together.  She hasn't decided if she will quilt it herself or send it out to be quilted.


The pattern for her quilt is by Margot Languedoc Designs by The Pattern Basket. It's called Strawberry Social.  


I forgot to get pictures of Kim and Sam's projects.  I'm just getting back into the whole blogging thing, so hopefully I'll do better at getting pictures.


Our sewing weekends are a wonderful way for us to relax, have fun and spend time doing something we love.  I've especially enjoy watching two young people embrace sewing.  It's becoming somewhat of a lost art and I'm happy to share with a new generation my love of sewing.


Happy Sewing!


Lori


Saturday, August 25, 2018

My First Foray into Bag Making!

I've been watching Sara Lawson with Sew Sweetness for several months.  I love her personality, openness and giving nature.  I've binged watched all of her videos and finally made time to try a bag.

Me being the somewhat cheap person I am decided to try one of her free patterns first.  And of course I had to use cheap fabric because if I completely failed, then I wouldn't be out much.  I'm not sure what I was thinking when I picked out my fabric, but then again, fabric selection has never been my strong point.


Really Lori??? Watermelons???? 


I think at the moment I was picking out the fabric, I thought I would give this purse to my four year old granddaughter.  However, if I was going to do that, I probably should have reduced the size to 75%.  Sara has a great and very active Facebook group that is not only supportive but offers great advice.  One thing I've seen mentioned several times is making bags smaller for kids.  So anyway, that's my excuse for picking watermelons!

The free pattern I made is called the Oriole Bag.  Sara's instructions and videos make it a fairly straightforward process.

First I printed and cut out the pattern and pattern pieces:


 Sara gives great instructions on how to print and assemble the pattern pieces.


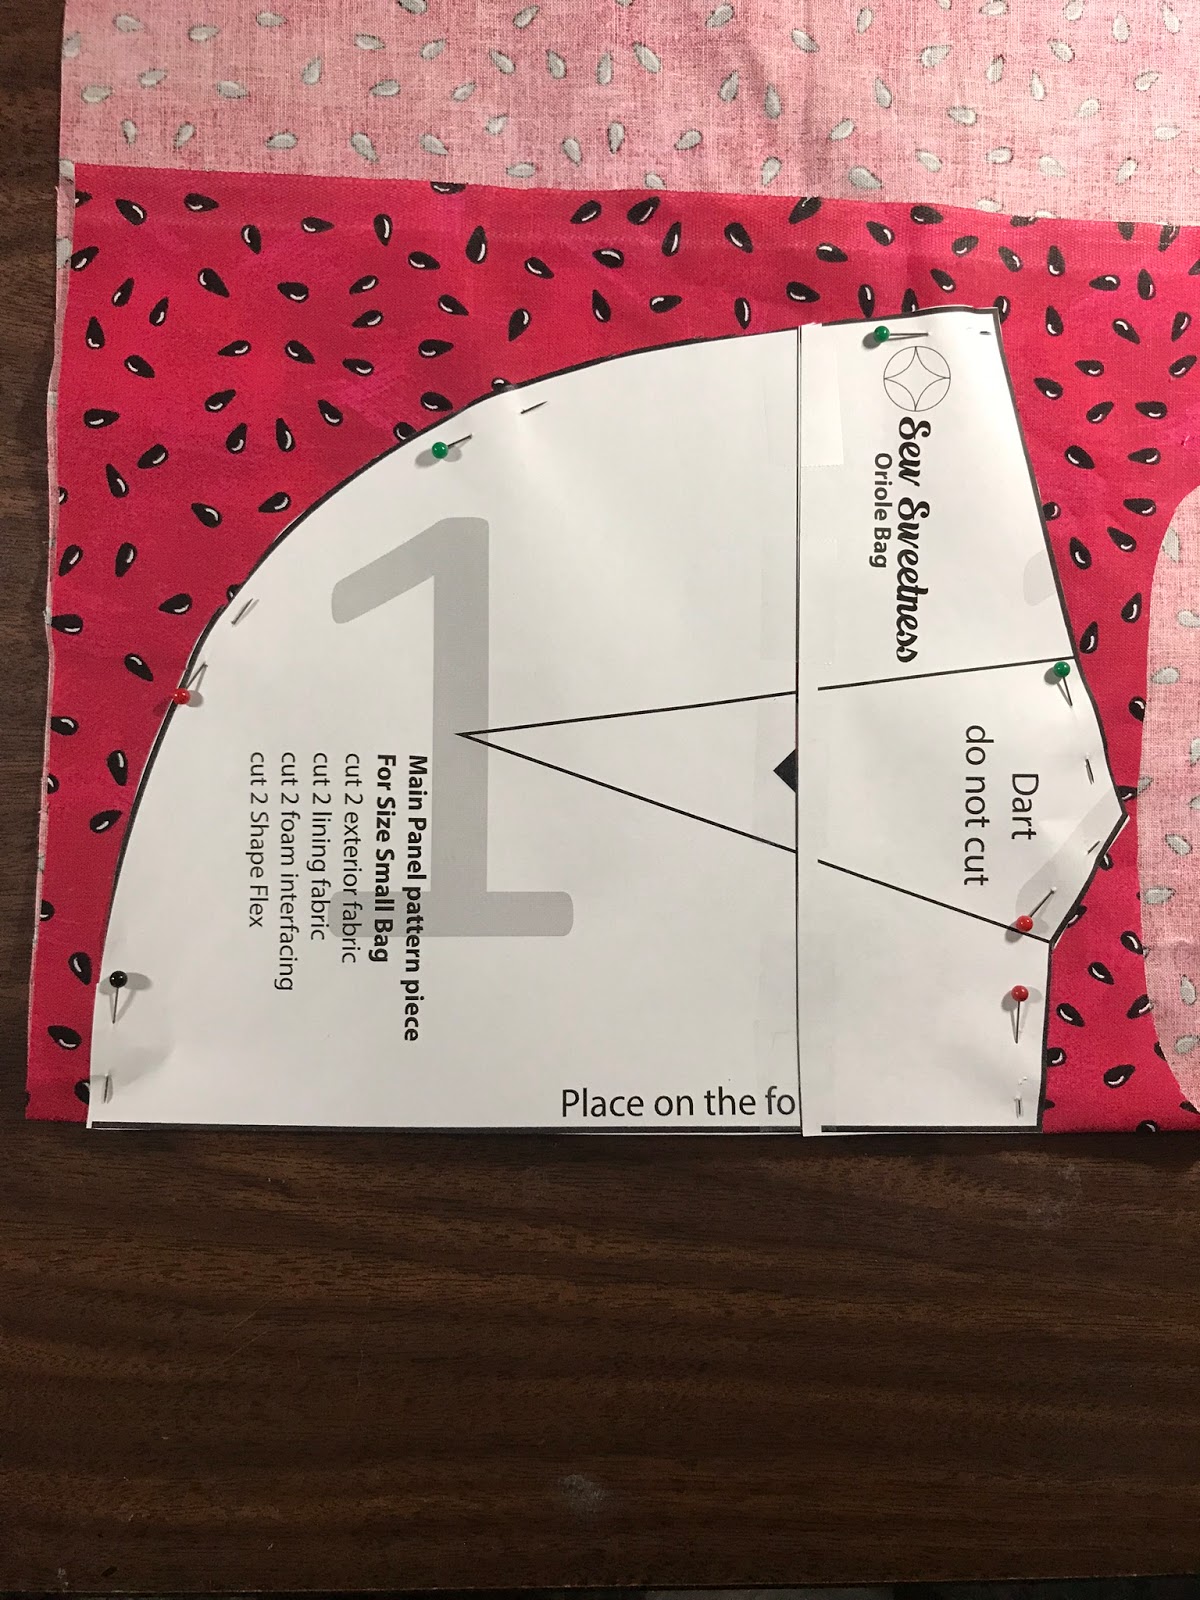
Sara uses a marker to draw around the patterns, but I couldn't get my marker to show up very well so I pinned.  That works just as well to.


All my pieces cut out and ready to go!


One part where I struggled was sewing the foam on with an 1/8 inch seam.  My machine does not like 1/8 inch seams with foam!


Added my pocket!

 Sara recommended cutting out the space for darts, but I didn't want to cut the pattern so I marked the top of the dart and made a pinhole at the point and marked there.


 I drew lines from the top to the dot at the point.


Ready to sew those darts!

This is where I had the most difficulty.  Sewing the darts on the lining went fine.  It was when I went to sew the darts on the main front and back pieces with the foam that I struggled.  I had a hard time getting the fabric to fold with the foam.  The first two darts I sewed had to be removed because I didn't get all the fabric in the dart.  It's kind of hard to explain, but the fabric didn't fold well with the foam.

To solve my problem I removed the 1/8 inch stitching (that I worked so hard on), sprayed a little 505 spray and smoothed the fabric.  Using the 505 held the fabric to the foam just enough so I could fold over the dart.


Added my first magnetic snap!  Thanks to Sara's instructions, it was a piece of cake, or maybe a slice of watermelon!


My finished bag! Making the adjustable strap was surprising easy.   Love the style of bag, still not sure about the watermelons.  I've always said I struggle selecting fabric and this really proves it!

I loved making the bag and Sara's pattern was very well written and with the video makes it almost foolproof.  I'll definitely make more of her patterns.  Next up is the The Baker Street Bag.  I've watched the video a couple of times and it actually looks fairly easy.

Have you tried any of Sara's patterns?  Do you consider yourself a bag lady?

Happy Sewing,

Lori


Tuesday, August 7, 2018

Review Tuesday-Wooly Felted Mat

The Wooly Felted Mats seem to be the newest craze.  I've been hearing wonderful things about them online and decided it was time to try one out!


I found this mat at Prairie Point Quilt and Fabric Shop in Shawnee, Kansas.  I don't get there very often because it's almost an hour away, but I LOVE this shop.   They had two sizes at the shop.  I chose to get the smaller of the two.  This one is 8 1/2 inches square and sold for $19.99.  The larger one was much bigger and sold for, I believe $79.99.  Since I wasn't sure if I'd even like it, I chose the smaller one.  Plus, I plan on using it next to my sewing machine and I'm supposed to be able to use it directly on any surface and it won't get damaged.


This was on the backside of the label.  I thought it was interesting and may have to try them sometime.

Since I didn't know too much about the wooly mats, I decided to head over to their website and see if I could find out a little more about them.  My first question, was "Can I use steam?"  I found the answer to that on the care instructions page.  I found out I can use steam, but I need to hang it up so it can dry.

I was told the mat would probably smell like wet dog or sheep when I first used it, but that it would go away in time.  I've honestly only used it once and didn't notice much of a smell.


Ok, this is the problem I have with the mat.  See all the moisture on the table?  Please forgive the big scratch, it's an old used table, but it's nice and sturdy.  The sales girl at the shop assured me one of the great things about this mat is that it could be used anywhere and the surfaces would not be harmed.

I ironed one fat eighth with a little steam and when I moved the mat, this is what I found.  If I hadn't looked at the website, I never would have even thought to see if the mat was wet.  I picked up the mat and was very surprised how wet it was and how much water was on the table.  I hung the mat up and it didn't take long to dry.

If I hadn't picked up that mat and checked, I think I could have easily ruined both the mat and my table.  This is something I've never worried about when ironing on my old fashioned ironing board.

I'm not sure what I think of this wooly mat. I'm going to refraining from rating it at this time and use it for a bit longer and then revisit the topic.

UPDATE!  I wrote the above about a week ago and have since done a little more research.  I think I didn't receive the full information from the sales girl at the shop.  Yes, it won't damage your surface...if you use a dry iron.  If you use steam you will need to place the mat on a protected surface and hang it up to dry when done.

Sara at Sew Sweetness talks about the mat in this You Tube video at about the 23:34 mark.  The brand she sells is The Gypsy Quilter.  In the video she reads right off the information on the package about using a dry iron versus a steam iron.  The brand, Wooly Felted Wonders that I purchased, did not have any of this information on the package.  I only found it by going to their website.

I'm giving the Wooly Felt Mat 💜💜💜 out of five.  I'm not in love with it and I don't want to worry about whether or not I'm using steam.  My plan was to keep this by my sewing machine, but I'm not sure that is going to happen now.


Do you have a wooly mat?  What do you think of yours?


Happy Sewing,

Lori