Saturday, August 25, 2018

My First Foray into Bag Making!

I've been watching Sara Lawson with Sew Sweetness for several months.  I love her personality, openness and giving nature.  I've binged watched all of her videos and finally made time to try a bag.

Me being the somewhat cheap person I am decided to try one of her free patterns first.  And of course I had to use cheap fabric because if I completely failed, then I wouldn't be out much.  I'm not sure what I was thinking when I picked out my fabric, but then again, fabric selection has never been my strong point.


Really Lori??? Watermelons???? 


I think at the moment I was picking out the fabric, I thought I would give this purse to my four year old granddaughter.  However, if I was going to do that, I probably should have reduced the size to 75%.  Sara has a great and very active Facebook group that is not only supportive but offers great advice.  One thing I've seen mentioned several times is making bags smaller for kids.  So anyway, that's my excuse for picking watermelons!

The free pattern I made is called the Oriole Bag.  Sara's instructions and videos make it a fairly straightforward process.

First I printed and cut out the pattern and pattern pieces:


 Sara gives great instructions on how to print and assemble the pattern pieces.


Sara uses a marker to draw around the patterns, but I couldn't get my marker to show up very well so I pinned.  That works just as well to.


All my pieces cut out and ready to go!


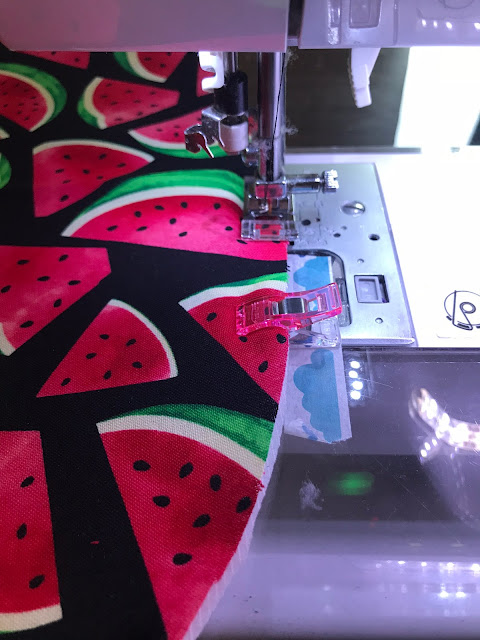
One part where I struggled was sewing the foam on with an 1/8 inch seam.  My machine does not like 1/8 inch seams with foam!


Added my pocket!

 Sara recommended cutting out the space for darts, but I didn't want to cut the pattern so I marked the top of the dart and made a pinhole at the point and marked there.


 I drew lines from the top to the dot at the point.


Ready to sew those darts!

This is where I had the most difficulty.  Sewing the darts on the lining went fine.  It was when I went to sew the darts on the main front and back pieces with the foam that I struggled.  I had a hard time getting the fabric to fold with the foam.  The first two darts I sewed had to be removed because I didn't get all the fabric in the dart.  It's kind of hard to explain, but the fabric didn't fold well with the foam.

To solve my problem I removed the 1/8 inch stitching (that I worked so hard on), sprayed a little 505 spray and smoothed the fabric.  Using the 505 held the fabric to the foam just enough so I could fold over the dart.


Added my first magnetic snap!  Thanks to Sara's instructions, it was a piece of cake, or maybe a slice of watermelon!


My finished bag! Making the adjustable strap was surprising easy.   Love the style of bag, still not sure about the watermelons.  I've always said I struggle selecting fabric and this really proves it!

I loved making the bag and Sara's pattern was very well written and with the video makes it almost foolproof.  I'll definitely make more of her patterns.  Next up is the The Baker Street Bag.  I've watched the video a couple of times and it actually looks fairly easy.

Have you tried any of Sara's patterns?  Do you consider yourself a bag lady?

Happy Sewing,

Lori


Tuesday, August 21, 2018

Review Tuesday-Block Loc Rulers

If you've never heard of the Bloc Loc ruler, go to their website and read all about them.  The rulers I have are square rulers with an indentation on the backside.  They are made for squaring up half square triangles. I understand they also have rectangle rulers for flying geese.

My sister gifted me a set of three rulers for my last birthday.  I'm now the proud owner of a 2 1/2 inch, 4 1/2 inch and a 6 1/2 inch square ruler. 


I don't make half square triangles too often, but when I do I've been using my new rulers and I have to say I love them!


I have to admit, every time I use one, it takes me a bit to remember how to use them.  Once I do, it's so easy.  In the pic above, I'm squaring up my half square triangle to 3 1/2 inches.  I place the ruler so it's locked on the seam so it's a little past the 3 1/2 inch mark.  I trim up the two sides.


Then I simply slide the ruler down the seam, line up the two sides I just trimmed to the 3 1/2 inch mark and trim off the other two sides.


And BAM!!  I have perfect 3 1/2 inch half square triangles!


I love the Bloc Loc rulers.  They make it so easy to get perfect cuts every time. 


The Bloc Loc rulers get  💜💜💜💜💜!    I can't recommend these rulers enough.  I honestly feel they make a huge difference in my cutting accuracy.

Do you have these rulers?  Do you love them as much as I do?

Happy Sewing,

Lori


Monday, August 20, 2018

Merry and Bright Sew Along Block #4

I'm so excited!  I'm staying caught up with Pat Sloan's Merry and Bright sew along. 

Block #4 is all about our wrapping memories.  I remember my mom used to hide our presents in a couple of closets.  We had a very small, old house with very few places to hide presents.  Of course we kids snooped.  Mom must have figured that out so she started wrapping our gifts as soon as she brought them in the house.  So we were left to shake them to try to figure out what we were getting.

My Merry and Bright #4


After placing my first four blocks together, I notice I'm using a lot of the same green.  I need to mix it up a little more. I can definitely tell which fabrics in the line Swell Christmas by Urban Chiks I like more than others!


Are you working on the Merry and Bright sew along?  What are your favorite Christmas wrapping memories?

Happy Sewing,

Lori

Tuesday, August 14, 2018

Review Tuesday-Olfa Rotating Mat

I purchased my Olfa Rotating mat several years ago with a coupon at Joann's.  I don't remember the price I paid.  Initially I was excited and thought I was going to love it.


It's 12 inch square...And that's the problem, it's SQUARE!!!


Every time I turn it, a corner either hits me or catches on something sitting near on the table.


If I put it near the edge of the table, where it's at a good spot for me to work, as soon as I turn it, I have problems.

This is definitely a case of don't try to save money and buy a cheaper square one.  Invest in a ROUND rotating mat!!

Maybe one like this  Martelli mat with an ironing pad.   Or this one looks good also.  I like it because it's my favorite color, pink!

Every time I pull out my square rotating mat, I cringe.  I know I'm going to fight it every step of the way.  Maybe I'll put one of the ones I listed above on my Christmas wish list.

The Olfa Rotating Mat gets just 💜💜out of five.  It does work fine as a regular small cutting mat, but not good for a rotating mat.

Do you have a rotating mat?  If you do is it round or square?

Happy sewing,

Lori


Friday, August 10, 2018

Merry and Bright Sew Along Block #3

I'm so excited I'm keeping up with the Merry and Bright Sew Along!  Wednesday Pat released block #3 and I completed it last night.


I picked the Santa fabric for the center block.  I think he's perfect!


I think I like this block the best so far.  I actually love the way these fabrics came together.


I have to say I'm loving this sew along.  Pat's directions are so clear it's impossible to mess the blocks up.  So far the blocks have been very simple to put together and haven't taken more than a few minutes from cutting to sewing.  Of course the hardest part is picking the fabric!

Are you doing Pat's Merry and Bright sew along?  Are you loving it as much as I am?

Happy sewing,

Lori

Wednesday, August 8, 2018

Merry and Bright Quilt Along

I tried one quilt along and only made it to five or six blocks before I started getting behind and then just gave up.  I'm not sure why I gave up.  I liked the blocks and the instructions were great. I loved the fabric I picked.  I think I just got busy with life.  Other projects came up and it got pushed aside.  It's definitely something I want to get back to at some point.

So, I've started a new quilt along, it's Pat Sloan's Merry and Bright quilt along.  It started July 25, 2018 a new block is released every Wednesday. The sew along will go until November 28, 2018.

Pat encourages everyone participating in the sew along to share memories based on the block.  I like that part of the sew along because it really makes me stop and try to remember all those old things from my childhood. She also asks us to post photos of our blocks and our memories on her Facebook page Quilt Along with Pat Sloan.  I love following all the other people's progress and their takes on each block.  There is so much creativity out there.

Pat suggested several different lines of fabric.  I chose Swell Christmas by Urban Chiks.


I went to a couple local quilt shops to find all the fabric I need.  I think I'm going to use Kona Snow as my background.  I haven't put them together yet, but I'm starting to think it may not be white enough.  Oh, darn, I may have to go shopping for more fabric!!


The first block is Home for the Holidays.


The second block is Hang a Wreath.


I love the way Pat suggests making half square triangles.  I used my Block Loc ruler to square them up, worked perfect!


 Pat's directions are so clear and easy, the blocks go together very quickly.


My first two blocks done!  The third block comes out today, can't wait to see what's next!

Have you ever done a sew along?  Did you make it to the end?

Happy sewing,

Lori

Tuesday, August 7, 2018

Review Tuesday-Wooly Felted Mat

The Wooly Felted Mats seem to be the newest craze.  I've been hearing wonderful things about them online and decided it was time to try one out!


I found this mat at Prairie Point Quilt and Fabric Shop in Shawnee, Kansas.  I don't get there very often because it's almost an hour away, but I LOVE this shop.   They had two sizes at the shop.  I chose to get the smaller of the two.  This one is 8 1/2 inches square and sold for $19.99.  The larger one was much bigger and sold for, I believe $79.99.  Since I wasn't sure if I'd even like it, I chose the smaller one.  Plus, I plan on using it next to my sewing machine and I'm supposed to be able to use it directly on any surface and it won't get damaged.


This was on the backside of the label.  I thought it was interesting and may have to try them sometime.

Since I didn't know too much about the wooly mats, I decided to head over to their website and see if I could find out a little more about them.  My first question, was "Can I use steam?"  I found the answer to that on the care instructions page.  I found out I can use steam, but I need to hang it up so it can dry.

I was told the mat would probably smell like wet dog or sheep when I first used it, but that it would go away in time.  I've honestly only used it once and didn't notice much of a smell.


Ok, this is the problem I have with the mat.  See all the moisture on the table?  Please forgive the big scratch, it's an old used table, but it's nice and sturdy.  The sales girl at the shop assured me one of the great things about this mat is that it could be used anywhere and the surfaces would not be harmed.

I ironed one fat eighth with a little steam and when I moved the mat, this is what I found.  If I hadn't looked at the website, I never would have even thought to see if the mat was wet.  I picked up the mat and was very surprised how wet it was and how much water was on the table.  I hung the mat up and it didn't take long to dry.

If I hadn't picked up that mat and checked, I think I could have easily ruined both the mat and my table.  This is something I've never worried about when ironing on my old fashioned ironing board.

I'm not sure what I think of this wooly mat. I'm going to refraining from rating it at this time and use it for a bit longer and then revisit the topic.

UPDATE!  I wrote the above about a week ago and have since done a little more research.  I think I didn't receive the full information from the sales girl at the shop.  Yes, it won't damage your surface...if you use a dry iron.  If you use steam you will need to place the mat on a protected surface and hang it up to dry when done.

Sara at Sew Sweetness talks about the mat in this You Tube video at about the 23:34 mark.  The brand she sells is The Gypsy Quilter.  In the video she reads right off the information on the package about using a dry iron versus a steam iron.  The brand, Wooly Felted Wonders that I purchased, did not have any of this information on the package.  I only found it by going to their website.

I'm giving the Wooly Felt Mat 💜💜💜 out of five.  I'm not in love with it and I don't want to worry about whether or not I'm using steam.  My plan was to keep this by my sewing machine, but I'm not sure that is going to happen now.


Do you have a wooly mat?  What do you think of yours?


Happy Sewing,

Lori

Tuesday, July 31, 2018

Review Tuesday -Dritz Quilter's Slip "N Grips

Of course I'm always late...This was supposed to be posted last Tuesday and I didn't make it.  Time gets away from me so easily.


Today I'm reviewing the Quilter's Slip 'N Grips by Dritz.  I'm not sure where I purchased them.  It was probably JoAnn's or Hancock's when they went out of business. The price on the back shows $3.99


They feel like sandpaper with sticky on the back.  Each dot is approximately 3/8 inch across.  They are easy to peel from the backing and they stick to my rulers and templates fine.  I've not had one come off yet.  I peeled one off and it came up easily with no sticky residue. I was able to re-position it stick it back down.


I've placed two on the back side of the Sue Daley 1 1/2 inch Hex template.


Initially one of my biggest concerns was because they aren't clear, would they get in the way of seeing the fabric.  I think for the most part those fears were unfounded.  Unless I'm fussing cutting something, I don't think this will be a problem.

So my initial review would be these work great...but....I recently watched an episode of The Stitch TV Show on You Tube where Lynn and Pam happened to mention sandpaper grips.  It was just a quick blurb at around the 23:48 mark in episode 308.  They briefly discuss not using the sandpaper grips because it can damage the fabric fibers.  I never thought of that, but it makes sense.  Now, I don't go rubbing them around on the fabric.  I try to place them and not move them so I'm not sure how much damage I'm actually doing, but I'd rather not take the chance. 

Because of the fear of damage to my fabric I'm rating these 💜💜💜 out of 5. 

Let me know if you've used the Slip 'N Grip and what you think of them.

Happy Sewing,

Lori

Saturday, July 28, 2018

English Paper Piecing

How is it I keep finding more projects to start, but can't seem to finish many??

Hubby and I are planning a trip this fall with several days of driving.  I've been thinking about what I could do to pass the time.  I don't like to read in the car because we can't chat.  So, I starting thinking about what type of sewing project I could do.

Last time we took a road trip, I made lots and lots of yoyos.  I still have them somewhere and can't think of anything to do with them.  I'm sure someday I'll pull them out again and figure something out.

I've been seeing videos and tutorials on English paper piecing and always thought that's not for me, it takes way too long.  But...I've always wanted to make a Grandmother's flower garden quilt.   My great grandmother made one and it's in pretty bad shape.

After watching several different techniques, I decided to go with Sue Daley's way.  Her way looks simple and very accurate.  So I bit the bullet and ordered most of the supplies.  I forgot to order the thread she suggested, but I got the glue pen, paper pieces, needles and the template.  I'm going to use fabric from my stash.

I ordered everything from Fat Quarter Shop, they seemed to be one of the few places in the United States with everything in stock!  Sue Daley must be pretty popular!


I've already decided I think I ordered the wrong size of hexies.  I ordered the 1 1/2 inch.  I think that's going to be too big. My thought was I didn't want to do tiny ones and it take forever.  But, after looking at them, I think they are too big.

Now my dilemma is do I go ahead and make a quilt or maybe something else with the bigger ones or order smaller ones.   Tough decision. 


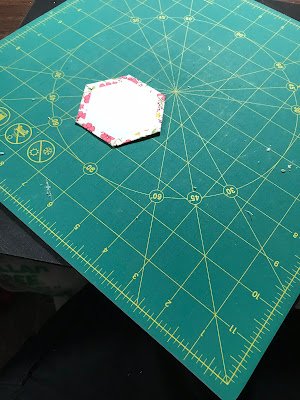
I've decided to make at least one complete flower and then decide if it's too big.  So I got started cutting them out. 


And gluing them.  So far it's going well.  It's actually pretty easy!


All the gluing done for my first complete flower.  Now for the part I'm not so sure about...the actual hand sewing.


I have the first round completed and it doesn't look half bad!  I've already figured out I need to get different thread.  I know to use polyester, but the only polyester thread I have is embroidery thread.  I struggled using it so I think I'm at a standstill until I can get the proper thread. 

But I do have to admit, it is rather fun.  I have decided to go ahead and go with the 1 1/2 inch hexies, it will make a big flower, but I guess it won't take as many to make a nice size quilt!

I'll keep you posted on my progress.

Have you tried English Paper Piecing?  Do you enjoy it?


Happy Sewing,

Lori
Tuesday, July 10, 2018

A New Feature-Reviews!

I don't get to sew often enough to feel like I have something to post each week or even every month!  So, I decided to try a weekly post reviewing a sewing/quilting item or pattern.  These will all be things I have purchased or received free for a minimum purchase.  I will attempt to post each week on Tuesday.  I plan on using purple heart emojis to rate what I'm reviewing.  I'll go from 1 to 5 hearts 💜💜💜💜💜, one being the worst, five being the best.

The first item I'm reviewing is something I received for free from Fat Quarter Shop.  I ordered several Sue Daley items to try my hand at English Paper Piecing (that will be the subject of several future posts) and the Ruler Grip was a free item.


I wasn't expecting much for a free item and when I received it, it was smaller than I expected.  I kind of wondered if it would even work.  It is approximately four inches long.  It has one suction cup on each end.


I put it on my 21/2 inch by 121/2 inch Creative Grids ruler. It was easy to attach and comes off easily by squeezing the suction cups.


It is the perfect length to hold between my thumb and middle finger.


 I love how it makes it much easier to pick up and move the ruler.  I chain pieced blocks for my Phoebe's Flower Box quilt and the grip made cutting the chain pieced blocks apart much easier.


I ended up really liking the Ruler Grip.  I think it will work best for smaller rulers.  I'm not sure it would stay attached to a larger, heavier ruler, although I did try it with my 5x15 inch ruler and it worked fine.  So maybe it's small but mighty!


I was pleasantly surprised.  I may actually purchase another one in the future. I'm giving the Ruler Grip from Fat Quarter Shop 5 hearts! 💜💜💜💜💜

Let me know what you think of your ruler grip.  And if you have ideas for future reviews, comment and I'll try to review it soon!

Happy Sewing,


Lori